Thai Chili Peppers: Spice Up Your Life
As a die-hard fan of spicy dishes and Thai cuisine, I’ve always been drawn to the fiery kick that Thai chili peppers bring to the table. Their unique flavor and heat level have the power to transform any meal into an unforgettable culinary experience. After trying countless recipes featuring these tiny yet potent peppers, I decided it was time to grow my own Thai chili peppers at home.
Growing Thai chili peppers in my garden not only allowed me to have a constant supply of these vibrant and flavorful ingredients, but it also gave me a newfound appreciation for the entire growing process. From selecting the perfect variety to harvesting the ripe peppers, each step has been a rewarding journey filled with learning opportunities and satisfying moments.
In this blog post, I want to share my experience and the knowledge I’ve gained to help fellow chili pepper enthusiasts embark on their own journey of growing Thai chili peppers at home. So, let’s dive into the world of Thai chili peppers and discover how you can grow them in your own backyard!
My Journey to Growing Flavorful Thai Chili Peppers at Home
Choosing the Right Thai Chili Pepper Variety
Before diving into the planting process, I knew I had to research the different types of Thai chili peppers available. I quickly learned that there are several varieties, each with their own unique characteristics, such as heat level, size, and color. Some of the most common types include Bird’s Eye, Prik Kee Noo Suan, and Prik Chi Fah.
After considering factors like heat level, growth habit, and adaptability to my local climate, I decided to grow the Bird’s Eye variety. These small, fiery peppers pack a punch and are commonly used in many Thai dishes. They also have a compact growth habit, making them suitable for container gardening if you’re short on space.
Tips for choosing the right variety:
- Research the different types of Thai chili peppers and their characteristics
- Consider your personal preferences, such as heat level and flavor
- Take into account your local climate and growing conditions
- Consult local gardeners or nurseries for advice on suitable varieties for your area
Preparing the Soil and Planting the Seeds
Once I had chosen my desired Thai chili pepper variety, it was time to prepare the soil and plant the seeds. Thai chili peppers prefer well-draining, fertile soil with a slightly acidic pH level between 6.0 and 6.5. To create the perfect soil mix, I combined equal parts of high-quality potting mix, compost, and perlite. This mixture ensured that my Thai chili pepper seeds had the right balance of nutrients and aeration to thrive.
I started my seeds indoors about 6-8 weeks before the last expected frost date in my area. This allowed the seedlings to develop a strong root system before being transplanted outdoors.
I filled small seed trays with my prepared soil mix and planted the seeds about 1/4 inch deep, lightly covering them with soil. I then placed the seed trays in a warm location with temperatures between 70°F and 85°F, making sure to keep the soil consistently moist but not waterlogged.
Tips for planting Thai chili pepper seeds:
- Start seeds indoors 6-8 weeks before the last expected frost date
- Use a well-draining, fertile soil mix with a slightly acidic pH level
- Plant seeds about 1/4 inch deep and keep the soil consistently moist
- Provide a warm environment with temperatures between 70°F and 85°F for optimal germination
Caring for My Thai Chili Pepper Seedlings
Within 7-14 days, I noticed the first signs of germination as tiny seedlings began to emerge from the soil. At this stage, it was crucial to provide the right amount of sunlight and water for my Thai chili pepper seedlings to grow strong and healthy.
I placed the seed trays near a sunny windowsill or under grow lights, ensuring that the seedlings received at least 6-8 hours of direct sunlight per day. As the seedlings grew, I made sure to keep the soil consistently moist but not soggy. Overwatering can lead to root rot and other issues, so I watered only when the top inch of the soil felt dry to the touch.
In addition to sunlight and water, I also kept an eye out for any potential pests or diseases that could harm my Thai chili pepper seedlings. Aphids, whiteflies, and spider mites are common pests that can attack young seedlings. To prevent these pests, I regularly inspected the leaves and stems of my plants and used insecticidal soap or neem oil as a natural deterrent when needed.
Tips for caring for Thai chili pepper seedlings:
- Provide at least 6-8 hours of direct sunlight per day
- Keep the soil consistently moist but not soggy
- Monitor for pests and diseases, using natural deterrents when necessary
- Maintain a clean growing environment to reduce the risk of diseases
Transplanting the Seedlings and Growing the Plants
After about 6-8 weeks, when the seedlings had developed at least two sets of true leaves and the outdoor temperatures were consistently above 60°F, it was time to transplant my Thai chili peppers. I carefully removed each seedling from its seed tray, taking care not to damage the delicate roots.
Before transplanting, I hardened off my seedlings by gradually exposing them to outdoor conditions over the course of a week. This process helped them acclimate to the new environment and reduced the risk of transplant shock.
I then planted the seedlings in my garden or in large containers, spacing them about 18-24 inches apart to allow for proper airflow and growth.
As my Thai chili pepper plants grew, I continued to provide them with the care they needed to thrive. I watered them regularly, ensuring the soil remained consistently moist but not waterlogged.
I also applied a balanced, slow-release fertilizer every 4-6 weeks to promote healthy growth and fruit production. To further encourage bushy growth and higher yields, I pinched off the growing tips when the plants reached about 12 inches in height.
Tips for transplanting and growing Thai chili pepper plants:
- Harden off seedlings before transplanting to reduce transplant shock
- Space plants 18-24 inches apart for proper airflow and growth
- Water regularly, keeping the soil consistently moist but not waterlogged
- Fertilize with a balanced, slow-release fertilizer every 4-6 weeks
- Pinch off growing tips to encourage bushy growth and higher yields
Harvesting and Enjoying My Homegrown Thai Chili Peppers
After months of nurturing my Thai chili pepper plants, the most rewarding moment had finally arrived – the harvest! I eagerly anticipated the day when I could pluck the ripe peppers from their branches and enjoy the fruits of my labor.
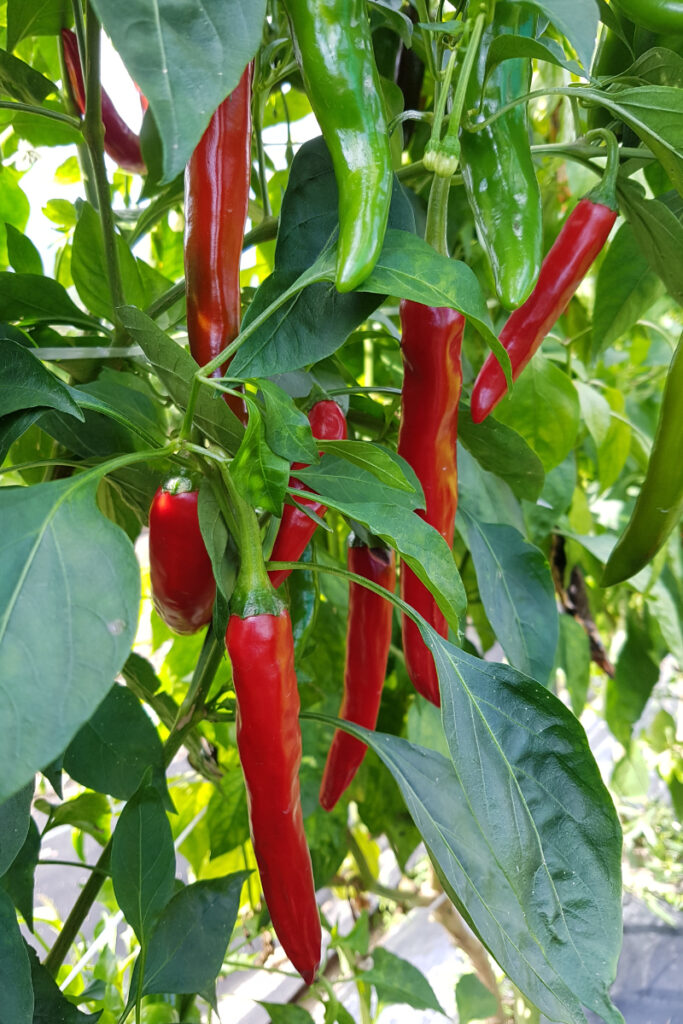
Thai chili peppers typically take 60-90 days to mature after transplanting, depending on the variety and growing conditions. I knew my peppers were ready for harvest when they reached their full size and developed a vibrant red or green color, depending on the specific variety. The skin of the ripe peppers should be firm and glossy, with no signs of wrinkling or soft spots.
To harvest my Thai chili peppers, I used a pair of sharp scissors or pruning shears to snip the peppers from the plant, leaving a short stem attached. It’s essential to handle the peppers carefully, as they contain capsaicin, a compound that can cause skin irritation or discomfort if touched. I always wore gloves while harvesting and washing the peppers to avoid any potential issues.
With a bountiful harvest of homegrown Thai chili peppers in hand, I couldn’t wait to get creative in the kitchen. These fiery peppers added an incredible depth of flavor and heat to various dishes, such as stir-fries, curries, sauces, and salads. One of my favorite ways to use my freshly picked peppers was to make my own Thai chili paste, which I could then store and use in different recipes for weeks to come.
Tips for harvesting and enjoying Thai chili peppers:
- Harvest peppers when they reach their full size and develop a vibrant color
- Use sharp scissors or pruning shears to snip peppers from the plant, leaving a short stem attached
- Handle peppers with care and wear gloves to avoid skin irritation from capsaicin
- Experiment with different recipes to fully appreciate the flavor and heat of your homegrown Thai chili peppers
- Consider making Thai chili paste or drying the peppers for extended use
Conclusion
Looking back on my journey of growing Thai chili peppers at home, I can confidently say that it has been one of the most rewarding and fulfilling gardening experiences I’ve ever had. From selecting the perfect variety to nurturing the seedlings and finally enjoying the flavorful harvest, each step of the process has taught me valuable lessons and given me a greater appreciation for the art of gardening.
As I continue to grow Thai chili peppers in my garden, I find myself constantly learning and improving my techniques, which only adds to the excitement and satisfaction of this gardening endeavor. Moreover, the joy of sharing my homegrown peppers with friends and family, as well as incorporating them into delicious dishes, is truly unmatched.
If you’re passionate about spicy flavors and Thai cuisine, I wholeheartedly encourage you to give growing Thai chili peppers a try. Not only will you have a constant supply of these fiery gems at your fingertips, but you’ll also embark on an exciting journey filled with learning, growth, and, ultimately, a sense of accomplishment.
So, gather your seeds, prepare your soil, and get ready to dive into the world of Thai chili peppers. Happy gardening!