Soil-Free Microgreens: Clean, Green & Fresh
My journey into the fascinating world of microgreens began when I stumbled upon a beautiful array of these tiny, vibrant greens at my local farmer’s market.
Intrigued by their delicate appearance and the enticing flavors they promised, I decided to give them a try. I was instantly hooked! Not only did they add a delightful burst of color and flavor to my dishes, but they also packed an impressive nutritional punch.
As I delved deeper into the world of microgreens, I discovered that they were not only delicious and healthy but also incredibly easy to grow. The idea of having a constant supply of fresh, homegrown microgreens right in my kitchen was too good to resist. And so, my adventure began.
Choosing the Right Microgreens
While there are many types of microgreens to choose from, some are better suited for growing without soil than others. Arugula, radish, kale, and broccoli are all excellent options as they tend to grow well in moist environments.
- Radish: Radish microgreens are quick and easy to grow, with a milder, sweet flavor.
- Kale: Kale microgreens have a slightly bitter taste and boast a deep green color that works well in salads or sandwiches.
- Arugula: Arugula microgreens can provide an intense spicy kick and brighten up any dish.
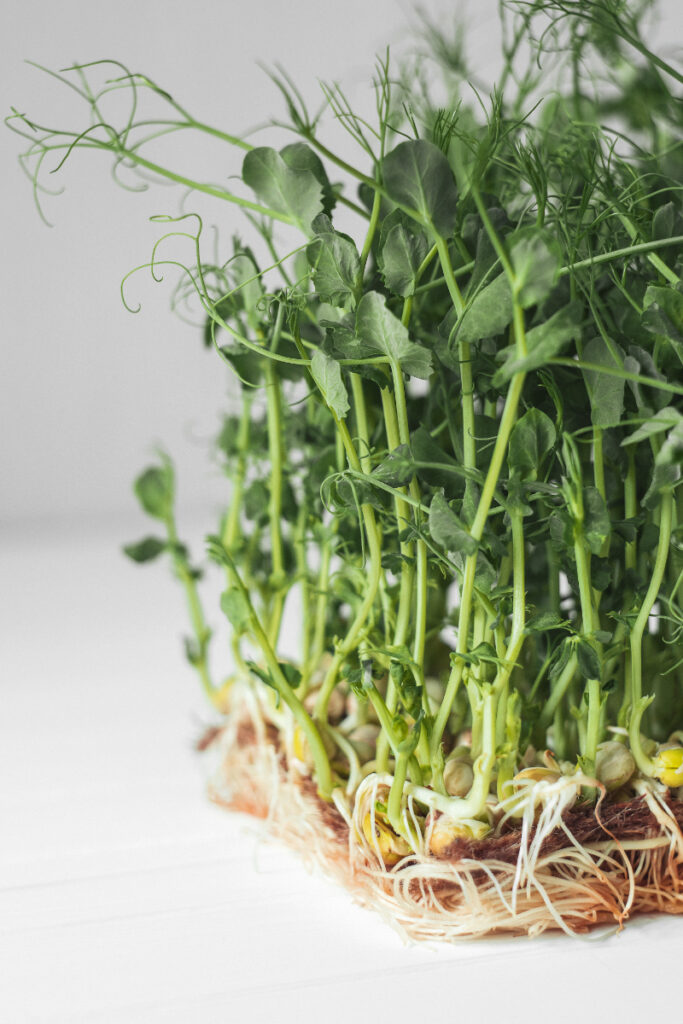
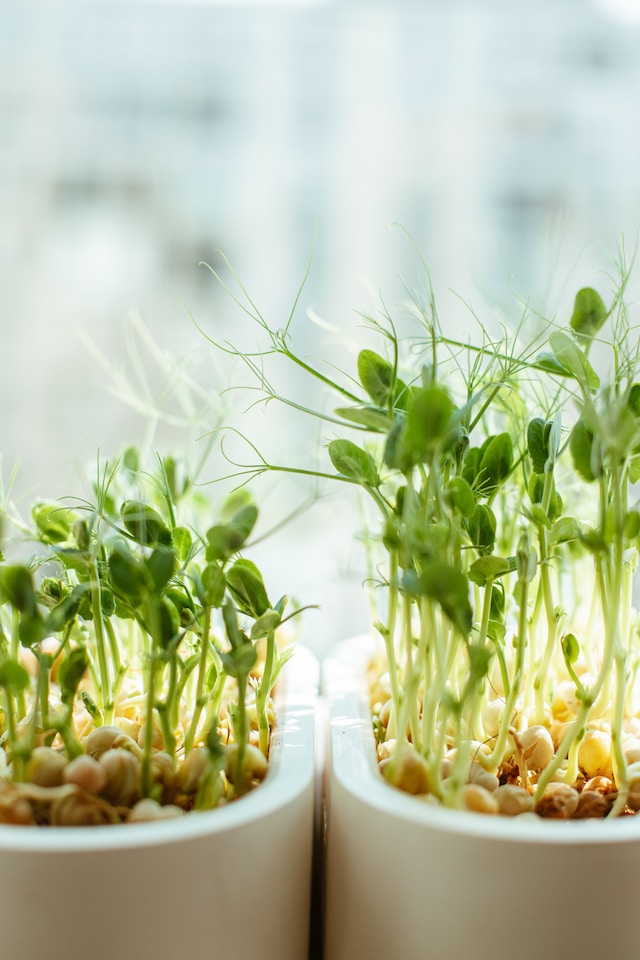
- Pea: Pea microgreens are a great source of protein and have a subtle, sweet flavor.
- Broccoli: Broccoli microgreens have an earthy taste and plenty of vitamins A and C.
These microgreens are known for their robust root systems and adaptability, making them ideal candidates for soilless growing methods. Plus, you can easily find the seeds in most gardening stores or online.
The Importance of Quality Seeds
Selecting high-quality seeds is crucial for successful microgreen growth. Look for seeds that are organic, non-GMO, and specifically labeled for use as microgreens.
This ensures that you’re starting with healthy, uncontaminated seeds that have been tested for germination rates and are free from harmful chemicals.
Additionally, make sure to store your seeds in a cool, dry place and discard any that are old or damaged.
If you’re unsure whether you can trust the quality of your seeds, it’s best to buy from reputable sources. They can also provide additional information on how to optimize your microgreen-growing experience.
Necessary Supplies
Soilless growing is an easy and efficient way to grow microgreens year-round. You’ll need a few basic supplies: water, microgreen seeds, a shallow container, and a cover (such as cheesecloth or paper towels).
One of the most important aspects of growing microgreens without soil is choosing the appropriate growing medium. This alternative to soil will provide your microgreens with the support, nutrients, and moisture they need to thrive. There are several options available, but my personal favorites include:
Coconut coir
Made from the fibers of coconut husks, coconut coir is an eco-friendly, renewable, and biodegradable growing medium. It retains moisture well, provides good aeration, and is resistant to mold and pests.
Grow mats
These specialized mats are designed specifically for growing microgreens and are made from materials such as hemp, jute, or wood fibers. They provide excellent support for your plants while allowing for proper drainage and air circulation.
Hydroponic systems
For those looking to take their soilless growing to the next level, hydroponic systems offer a high-tech solution. These systems deliver water and nutrients directly to your plants’ roots, allowing for faster growth and higher yields.
Other tools and equipment
In addition to your growing medium and seeds, you’ll also need a few other items to set up your soilless microgreens garden:
- Trays or containers: Choose shallow trays or containers with drainage holes for housing your growing medium and microgreens. You can find specialized microgreen trays or repurpose items like baking sheets or plastic food containers.
- Light source: Microgreens require plenty of light to grow properly. If you don’t have access to sufficient natural sunlight, consider using a grow light to provide the necessary light spectrum for healthy growth.
- Spray bottle: A spray bottle filled with clean water is essential for keeping your microgreens moist during germination and growth.
- Clean scissors: You’ll need a pair of clean, sharp scissors for harvesting your microgreens when they’re ready.
Preparing Your Seeds and Growing Medium
Now that you have all of your supplies, it’s time to get started. Begin by preparing your growing medium according to the manufacturer’s directions. This usually involves soaking or fluffing it before use.
Soaking and germinating your seeds
Before planting, some microgreen seeds benefit from a brief soaking period to help jumpstart the germination process.
For larger seeds like peas and sunflowers, soaking for 8-12 hours in room temperature water is recommended. For smaller seeds like radish, broccoli, and arugula, a shorter soak of 2-4 hours is usually sufficient.
Once your seeds have soaked, drain them and allow them to sit in a damp paper towel or cloth for a few hours to encourage germination. Keep the seeds moist and in a dark, warm place during this time.
Setting up your growing medium
While your seeds are germinating, prepare your chosen growing medium according to the manufacturer’s instructions or specific requirements of your hydroponic system. Here’s a quick guide for setting up coconut coir and grow mats:
Coconut coir
If you’re using coconut coir, it often comes in compressed blocks that need to be rehydrated. Place the block in a large container and add water until the coir expands and becomes fluffy.
Once hydrated, spread the coir evenly across your tray or container, creating a layer about 1 inch thick. Then you’re ready to plant your seeds.
Grow mats
If you opt for grow mats, simply cut the mat to fit the size of your tray or container. Place the cut mat in the tray and moisten it with clean water until it’s damp but not overly saturated.
Hydroponic systems
If you opt for a hydroponic system, you’ll need to set it up and adjust the water flow rate according to the manufacturer’s instructions. Once everything is in place, add your growing medium, such as clay pebbles or expanded clay pellets.
Planting and Nurturing Your Microgreens
Now that you’ve prepared your growing medium and gathered your supplies, it’s time to plant. Scatter your soaked and germinated seeds across the surface of the medium and gently press them down to ensure good contact with the growing medium.
Proper seed spacing and planting depth
To ensure a healthy and successful harvest, it’s important to plant your seeds with the right spacing and depth. Here’s how to do it for each of the most popular soilless microgreens:
- Radish, broccoli, and arugula: Evenly scatter the seeds across the surface of your growing medium, aiming for a density of about 10-12 seeds per square inch. There’s no need to bury these seeds; just press them gently into the medium to make good contact.
- Pea and sunflower: Space these larger seeds about 1 inch apart on your growing medium. Gently press them into the medium so that they are slightly covered, but not buried too deep.
Once your seeds are planted, mist them generously with water using your spray bottle. Then, cover your tray or container with a lid or another tray to create a dark, humid environment that encourages germination.
Providing adequate light and moisture
Check your microgreens daily to ensure they remain moist but not overly wet. Use your spray bottle to mist them as needed, being careful not to overwater. Overwatering can lead to mold growth and other issues.
After 3-5 days, you should see your microgreens starting to sprout. At this point, remove the cover and expose them to light. If you’re using a grow light, position it about 6-12 inches above the microgreens and set a timer to provide 12-16 hours of light per day.
If you’re relying on natural sunlight, place your microgreens near a sunny window where they’ll receive at least 6-8 hours of direct light each day.
Tips for preventing mold and other issues
One of the biggest problems you can encounter when growing microgreens without soil is mold growth, caused by too much moisture and inadequate air circulation. Once there’s mold there, you cannot salvage your microgreens.
To keep your soilless microgreens healthy, follow these tips to prevent mold and other common problems:
- Ensure proper air circulation around your microgreens by placing them in a well-ventilated area or using a small fan.
- Avoid overwatering, as excess moisture can lead to mold growth. Mist your microgreens lightly and consistently, rather than soaking them heavily.
- Keep your growing area clean and free from debris to reduce the risk of pests and diseases.

Harvesting and Enjoying Your Microgreens
The ideal time to harvest your soilless microgreens will vary depending on the variety, but most are ready to harvest when they have developed their first set of true leaves.
This typically occurs within 7-14 days after planting, although some varieties may take slightly longer. Here’s a general timeline for my favorite microgreens:
- Radish: 7-10 days
- Broccoli: 10-14 days
- Arugula: 10-12 days
- Pea: 12-16 days
- Sunflower: 10-12 days
Keep an eye on your microgreens’ growth and watch for the appearance of their true leaves as an indicator that it’s time to harvest.
How to properly cut and store your harvest
To harvest your microgreens, use clean, sharp scissors to snip them just above the growing medium. Be gentle and avoid pulling or tugging on the plants, as this can disturb the roots and potentially damage your growing medium.
Once harvested, gently rinse your microgreens in cool water and pat them dry with a clean paper towel or cloth. To store your microgreens, place them between layers of damp paper towels or in a produce storage container with a damp cloth, and refrigerate. Properly stored, most microgreens will stay fresh for up to a week.
Ways to use microgreens in the kitchen
The biggest benefit of growing your own microgreens at home is that you get to enjoy their freshness and flavor in all sorts of recipes. Plus, since you grow them soilless, you don’t have to worry about dirt or grit getting into your food.
Try adding microgreens as a finishing touch to salads, sandwiches, and other dishes. They also make great garnishes for soups, stews, and roasted vegetables. And of course, they’re delicious in smoothies and drink recipes too!
- Salads: Toss a handful of mixed microgreens into your favorite salad for added color, flavor, and nutrients.
- Sandwiches and wraps: Layer microgreens onto sandwiches and wraps for a fresh, crunchy texture and a burst of flavor.
- Smoothies and juices: Blend microgreens into your favorite smoothie or juice recipe for an extra dose of vitamins and minerals.
- Garnishes: Use microgreens as a beautiful, edible garnish for soups, grain bowls, and other dishes.
- Stir-fries: Add microgreens to stir-fries in the last minute of cooking for a pop of color and a subtle, fresh flavor.
Expanding Your Soilless Microgreens Garden
Now that you’ve mastered the art of growing soilless microgreens, why not expand your repertoire and try growing some new varieties?
There are countless microgreens to choose from, each with its unique flavor profile and nutritional benefits. Some additional options to consider include:
- Beet microgreens: These colorful microgreens boast a sweet, earthy flavor and are rich in vitamins and minerals.
- Cilantro microgreens: With their distinct, aromatic flavor, cilantro microgreens are perfect for adding a fresh touch to Mexican and Asian dishes.
- Wheatgrass: Known for its detoxifying properties, wheatgrass is a popular choice for juicing enthusiasts.
Remember to research the specific growing requirements of any new varieties you choose, as some may have different light, moisture, or nutrient needs.
Also, keep in mind that not all varieties can be grown soilless, and not all is edible. Some may need soil or a special growing medium in order to thrive. Check the seed package for specific growing instructions, and make sure to only consume varieties that are deemed safe for eating.
If you find yourself enjoying the process of growing and consuming microgreens, consider scaling up your operation to grow larger quantities or multiple varieties simultaneously.
This can be done by using larger trays, multiple trays, or even dedicating an entire shelving unit to your soilless microgreens garden.
You can also explore more advanced soilless growing methods, such as aeroponics or aquaponics, which can offer increased efficiency and yield.
Expanding your soilless microgreens garden is an exciting and rewarding way to explore the world of edible plants. Just remember: as your garden grows, so will your appreciation for all that these tiny greens have to offer!
Troubleshooting Common Issues
While it’s quite easy to grow microgreens without soil, you may encounter a few problems along the way. The most common issues you may face include nutrient deficiencies, insect infestations, and mold growth.
Nutrient deficiency
Microgreens grown without soil can sometimes experience nutrient deficiencies, as they are not getting any nutients from the soil. To prevent this issue, look for specialized fertilizer blends specifically designed for soilless microgreens, or supplement your growing medium with a water-soluble liquid fertilizer.
Insects and Pests
Insects are always on the lookout for nutritious meals, and can quickly become a problem in your soilless microgreens garden. To keep insects at bay, cover your growing medium with a fine mesh or screen to prevent them from getting in.
You can also use natural insect repellents such as diatomaceous earth, neem oil, and bacillus thuringiensis (BT) to discourage pests.
Damping-off disease and mold growth
One of the most common issues encountered when growing soilless microgreens is damping-off disease, a fungal infection that can cause seedlings to collapse and die. Mold growth is another issue that can affect the health of your microgreens. To prevent these problems:
- Ensure proper air circulation around your microgreens by placing them in a well-ventilated area or using a small fan.
- Avoid overwatering, as excess moisture can promote fungal growth. Mist your microgreens lightly and consistently, rather than soaking them heavily.
- Keep your growing area clean and free from debris to reduce the risk of pests and diseases.
Leggy or pale microgreens
If your microgreens appear leggy (tall and thin) or pale, it’s likely they’re not receiving enough light. To remedy this issue:
- Move your microgreens to a sunnier location or adjust your grow light to provide more light.
- Ensure your grow light is positioned close enough to your microgreens (6-12 inches) and set a timer to provide 12-16 hours of light per day.
Slow or inconsistent germination
If your seeds are taking longer than expected to germinate or you’re experiencing uneven germination, consider the following factors:
- Seed quality: Make sure you’re using high-quality, fresh seeds specifically labeled for use as microgreens.
- Temperature: Most microgreens prefer temperatures between 65-75°F (18-24°C) for germination and growth. Ensure your growing area maintains a consistent temperature within this range.
- Moisture: Keep your seeds consistently moist during germination by covering your trays and misting as needed. Avoid letting the growing medium dry out completely or become overly saturated.
In Conclusion
Soilless microgreens gardening is an innovative and sustainable way to grow fresh, nutrient-dense greens right in your own home.
With a little practice and experimentation, you’ll quickly master the art of growing microgreens without soil, reaping the many health benefits they offer while reducing your environmental impact.
At the end of the day, growing soilless microgreens is all about experimenting, learning and having fun. So find your favorite varieties and get started! You may just find yourself addicted to the hobby in no time!