Grow Plump Carrots in Florida: Top Tips
Welcome to our guide on growing plump carrots in Florida! Carrots are not only a popular and versatile vegetable, but they’re also packed with nutrients that can benefit your health.
With their sweet taste and crisp texture, it’s no wonder that many Florida gardeners want to grow their own carrots at home. However, cultivating healthy, plump carrots in Florida’s unique climate can be challenging without the right knowledge and techniques.
In this guide, we will provide you with top tips and best practices for growing delicious, plump carrots in the Sunshine State. We’ll walk you through the characteristics of carrots suitable for Florida’s climate, soil preparation, planting and caring for your carrot garden, as well as addressing common pests and diseases.
With these guidelines, you’ll be on your way to a bountiful harvest of beautiful, plump carrots from your very own garden. Let’s dive in and get started!
Growing and Enjoying Plump Carrots: A Comprehensive Guide for Florida Gardeners
Characteristics of Carrots
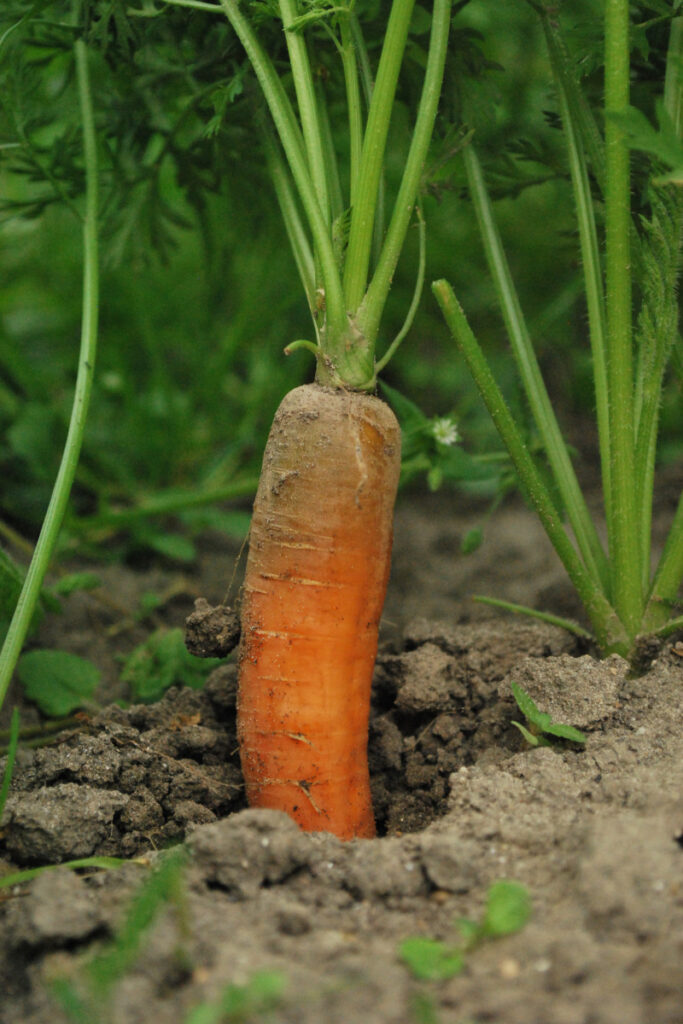
Carrots are a root vegetable that come in various shapes, sizes, and colors. Understanding the characteristics of carrots is essential for successfully growing them in Florida’s unique climate. Here are some key aspects to consider:
Types of carrots suitable for Florida’s climate:
- Imperator: These carrots are long, slender, and tapered with a sweet flavor, making them a popular choice.
- Nantes: Known for their cylindrical shape and blunt tips, Nantes carrots have a mild and sweet taste.
- Danvers: With a conical shape and broad shoulders, Danvers carrots are well-suited to heavy soils and have a strong, sweet flavor.
- Chantenay: Shorter and stumpier than other varieties, Chantenay carrots thrive in shallow or rocky soils and have a sweet, earthy taste.
- Miniature/Baby Carrots: These tender and bite-sized carrots are perfect for container gardening and snacking.
Soil requirements and best planting times for optimal growth:
- Carrots grow best in loose, well-draining soil with a pH between 6.0 and 6.8.
- Sandy loam is ideal for carrot cultivation, as it allows roots to penetrate easily and grow straight.
- In Florida, the best time to plant carrots is during the fall and winter months, typically between September and February.
Watering and fertilization needs for plump, healthy carrots:
- Carrots need consistent moisture, so water regularly, ensuring the soil remains evenly moist but not waterlogged.
- Applying a slow-release, balanced fertilizer at the time of planting can promote healthy root development.
- Avoid high-nitrogen fertilizers, as they can lead to excessive foliage growth and poorly developed roots.
Preparing to Grow Carrots
Before you start growing carrots in your Florida garden, it’s essential to prepare the right environment for them to thrive. Here are some crucial steps for preparing to grow carrots:
Choosing the right location for your carrot garden:
- Select a site with full sun exposure, as carrots need at least 6-8 hours of direct sunlight per day.
- Ensure the chosen area has good drainage to prevent waterlogged soil, which can lead to rotting and stunted growth..
Soil preparation techniques, including amending soil with compost or other organic matter:
- Begin by removing any rocks, debris, or large clumps of soil to create a smooth and even planting surface.
- Use a garden fork or tiller to loosen the soil to a depth of at least 12 inches, allowing for proper root development.
- Amend the soil with well-aged compost or other organic matter to improve its structure and nutrient content.
- Test the soil pH to ensure it falls within the ideal range of 6.0-6.8. If necessary, adjust the pH using lime (to raise pH) or sulfur (to lower pH).
Planning seed placement and spacing for ideal growing conditions:
- Carrot seeds should be sown directly into the prepared soil, as transplanting can damage the delicate roots.
- Plan to space rows about 12-18 inches apart to provide enough room for proper growth and air circulation.
- Sow seeds about 2-3 inches apart within each row. After germination, thin seedlings to a final spacing of 1-2 inches for smaller varieties or 3-4 inches for larger varieties.
Planting and Caring for Carrots
Once you have prepared the soil and planned seed placement, it’s time to plant and care for your carrots. Follow these steps to ensure a successful harvest:
Planting techniques
- Sow carrot seeds directly into the prepared soil, as transplanting can damage the delicate roots.
- Scatter seeds thinly along the rows, aiming for a spacing of about 2-3 inches apart.
- Cover the seeds with a thin layer of soil (about 1/4 inch) and gently press down to ensure good seed-to-soil contact.
Proper watering and irrigation methods
- Keep the soil consistently moist, especially during the germination period, which typically takes 14-21 days.
- Once seedlings emerge, continue to water regularly, ensuring the soil remains evenly moist but not waterlogged.
- Consider using drip irrigation or soaker hoses to maintain consistent moisture levels and prevent the growth of weeds.
Thinning out seedlings
- When seedlings are about 2 inches tall, thin them out to ensure adequate space for each carrot to grow.
- For smaller varieties, thin to a final spacing of 1-2 inches apart. For larger varieties, thin to a spacing of 3-4 inches apart.
- Be gentle when thinning to avoid disturbing the roots of neighboring seedlings.
Ongoing care and maintenance
- Keep the garden free of weeds, as they compete with carrots for nutrients and water.
- Apply a layer of organic mulch, such as straw or shredded leaves, to help retain moisture, suppress weeds, and regulate soil temperature.
- Monitor for pests and diseases, addressing any issues promptly to maintain the health of your carrot plants.
Pest and Disease Control
To ensure a successful carrot harvest, it’s essential to be aware of common pests and diseases that can affect your crop in Florida. Here are some tips on managing these issues:
Common pests affecting carrots in Florida:
- Carrot Rust Fly: The larvae of this fly feed on carrot roots, causing rust-colored tunnels and damage to the outer skin.
- Root-knot Nematodes: These microscopic worms attack the roots, causing knots and stunted growth.
- Aphids: These tiny insects suck plant sap and can transmit viruses, leading to yellowing leaves and distorted growth.
Organic and chemical control methods to combat pest and disease issues:
- Use floating row covers to protect young carrot plants from carrot rust flies and aphids.
- Introduce beneficial insects, such as ladybugs and lacewings, which prey on aphids.
- Apply organic or chemical insecticides, following label instructions, to target specific pests.
- For nematode control, consider using soil solarization or applying a bio-nematicide product.
Prevention techniques to reduce the risk of pest and disease problems:
- Practice crop rotation, avoiding planting carrots in the same location for at least two years.
- Keep the garden free of weeds and debris, which can harbor pests and diseases.
- Water your carrots properly, as overwatering can promote root rot and other diseases.
- Choose disease-resistant carrot varieties when possible.
Harvesting and Storing Carrots
Knowing when and how to harvest your carrots, as well as proper storage techniques, is essential to enjoying the fruits of your labor. Here are some tips for harvesting and storing your Florida-grown carrots:
Signs of when carrots are ready for harvesting:
- Carrots can be harvested at any size, but they typically reach their optimal flavor and texture when they reach their mature size.
- Check the diameter of the carrot’s shoulder (the top part of the root) – it should be about 0.5-1 inch in diameter, depending on the variety.
- The color of the carrot should be vibrant and uniform, indicating that it has reached maturity.
- In general, most carrot varieties take between 60-80 days from planting to reach maturity.
Proper harvesting technique:
- Water the soil before harvesting to make it easier to pull the carrots out without breaking them.
- Grasp the carrot’s foliage near the base, close to the soil line.
- Gently wiggle the carrot back and forth while pulling upward to loosen it from the soil. Be careful not to damage the root.
- If necessary, use a garden fork or spade to gently loosen the soil around stubborn carrots before pulling them out.
Storage and preservation methods:
- Remove the foliage by cutting it off about 1/4 inch above the carrot’s shoulder to prevent moisture loss during storage.
- Brush off any excess soil but avoid washing the carrots until you’re ready to use them, as moisture can lead to spoilage.
- Store carrots in a cool, dark, and humid environment, such as a refrigerator or root cellar, with a temperature of 32-40°F and 90-95% humidity.
- Place the carrots in perforated plastic bags or wrap them in a damp cloth to maintain humidity.
- For longer storage, consider freezing, canning, or pickling your carrots.
Conclusion
Growing plump, delicious carrots in Florida can be a rewarding experience if you follow the right practices. By understanding the characteristics of carrots suitable for Florida’s climate and preparing your garden properly, you’ll create a strong foundation for a successful harvest.
Be sure to provide ongoing care and maintenance, including proper watering, thinning, and pest and disease control, to ensure the health of your carrot plants.
When it’s time to harvest, look for signs of maturity, such as vibrant color and appropriate size, and use gentle techniques to avoid damaging the roots. Finally, store your harvested carrots using appropriate methods to extend their shelf life and enjoy the fruits of your labor.
With these guidelines, you’ll be well on your way to enjoying a bountiful harvest of beautiful, plump carrots from your very own Florida garden. Happy gardening!