Grow Asparagus from Scraps: Thrifty Tips
As an avid gardener and sustainability enthusiast, I’m always on the lookout for ways to reduce waste and make the most of my resources. One day, while enjoying a delicious meal of grilled asparagus, I wondered if it was possible to grow new asparagus plants from the discarded ends.
Intrigued by the idea, I embarked on a journey to learn everything I could about growing asparagus from scraps. This guide is a culmination of my experiences and discoveries, aimed at helping fellow gardeners and aspiring green thumbs to grow their own asparagus with ease.
My Asparagus Adventure: A Step-by-Step Guide to Growing Asparagus from Scraps
Getting to Know Asparagus
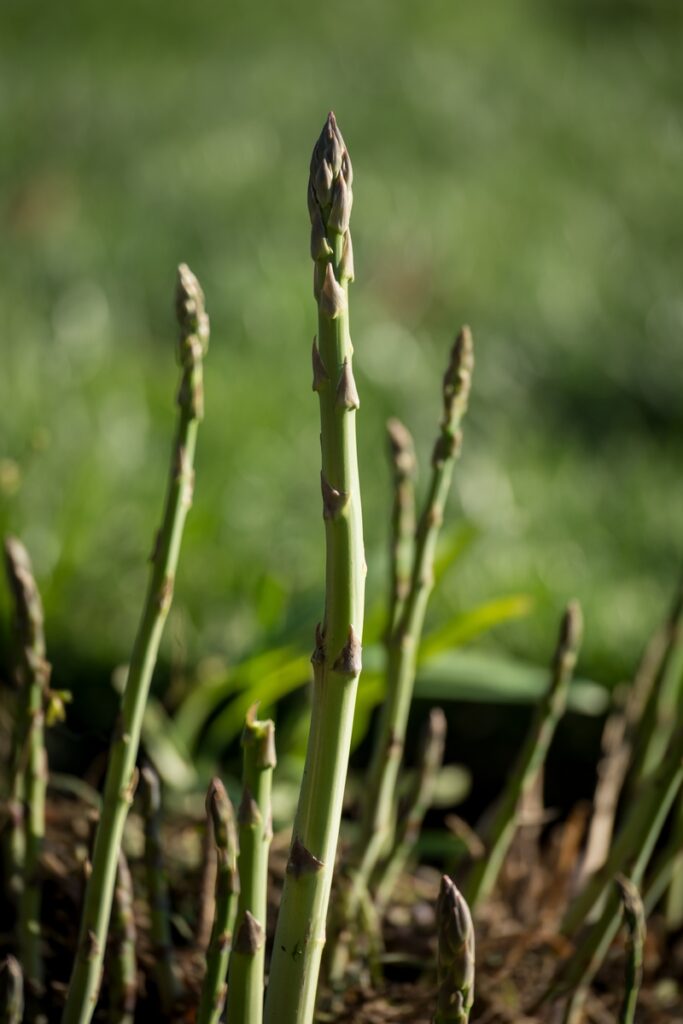
Before diving into the process of growing asparagus from scraps, it’s important to familiarize ourselves with this versatile and nutritious vegetable. Asparagus is a perennial plant that belongs to the lily family and is native to Europe, western Asia, and northern Africa.
It’s known for its tender, edible spears and has been a popular vegetable for centuries thanks to its unique flavor and impressive health benefits.
Asparagus is low in calories, but high in essential nutrients like fiber, vitamins A, C, E, and K, and minerals such as potassium, phosphorus, and iron. It’s also a rich source of antioxidants and has been linked to various health benefits, including improved digestion, reduced inflammation, and better heart health.
The growth cycle of asparagus plants is fascinating, as they can take up to 2-3 years to reach full maturity after being planted from seeds or crowns. However, once established, an asparagus plant can continue producing spears for up to 20 years or more.
This makes it an ideal choice for those looking to invest time and effort into a long-lasting, bountiful garden. Now that we have a better understanding of asparagus and its characteristics, let’s explore how we can grow this amazing vegetable from scraps.
Selecting and Preparing Asparagus Scraps
The first step in growing asparagus from scraps is to choose the right pieces to give your future plants the best chance of success. When selecting asparagus scraps, look for spears that are fresh, firm, and have a healthy green color. Avoid using wilted, discolored, or slimy asparagus, as these are less likely to regrow successfully.
Once you’ve chosen your asparagus scraps, it’s time to prepare them for the regrowth process. Start by cutting off the bottom inch or two of each spear, which is usually the toughest and least desirable part for consumption.
This will leave you with the woody, fibrous ends that are ideal for rooting. Next, rinse the asparagus ends thoroughly under cool water to remove any dirt or debris.
Rooting Asparagus Scraps in Water
Now that your asparagus scraps are clean and ready, it’s time to start the rooting process. To do this, you’ll need a clear glass jar or container that’s large enough to hold the asparagus ends without overcrowding them.
Fill the jar with enough water to submerge the bottom half of the asparagus ends, ensuring that the cut surfaces are fully immersed.
Place the jar in a sunny spot, preferably near a window that receives plenty of natural light. Make sure the area isn’t too hot, as excessive heat can cause the water to evaporate quickly and hinder root development.
During this stage, it’s important to monitor the progress of your asparagus scraps and provide them with the care they need. Check the water level daily and top it off as necessary to maintain consistent submersion.
In about one to two weeks, you should start to see small roots emerging from the cut ends of the asparagus. This is an exciting indication that your asparagus scraps are taking to their new environment and preparing to grow into full-fledged plants.
Once the roots are approximately 1-2 inches long, your asparagus scraps are ready to be transplanted into soil, where they’ll continue their journey to becoming productive asparagus plants.
Moving Asparagus Scraps to Soil
With your asparagus scraps successfully rooted, it’s time to transplant them into soil where they can continue to grow and thrive. Begin by preparing the planting area or container for your asparagus plants.
If you’re planting in a garden bed, choose a location that receives at least 6-8 hours of sunlight per day and has well-draining, fertile soil. Asparagus prefers a slightly acidic to neutral soil pH, ideally between 6.0 and 7.0.
To prepare the soil, loosen it to a depth of about 12 inches and mix in a generous amount of compost or well-rotted manure. This will improve soil fertility and drainage, creating an ideal environment for your asparagus plants to grow.
If you’re planting in a container, choose one that’s at least 18 inches deep and has drainage holes at the bottom. Fill the container with a high-quality potting mix, preferably one that’s designed for growing vegetables.
When transplanting your rooted asparagus scraps, dig a hole that’s deep enough to accommodate the entire root system without bending or crowding the roots. Gently place the asparagus end into the hole, making sure that the roots are spread out and not tangled.
Cover the roots with soil and firm it down gently to eliminate air pockets and ensure good contact between the roots and soil. Space the asparagus plants about 12-18 inches apart to give them enough room to grow.
Tending to Your Asparagus Plants
Now that your asparagus plants are settled into their new home, it’s important to provide them with the proper care to ensure healthy growth and development. Water your asparagus plants regularly, keeping the soil consistently moist but not waterlogged.
As a general rule, asparagus requires about 1-2 inches of water per week, either from rainfall or supplemental watering.
Feed your asparagus plants with a balanced fertilizer, following the package instructions for application rates and frequencies. Asparagus benefits from regular feeding, especially during the first couple of years as it establishes its root system and begins to produce spears.
In addition to providing water and nutrients, it’s important to monitor your asparagus plants for signs of pests or disease. Common asparagus pests include asparagus beetles, aphids, and spider mites, while diseases like rust, fusarium wilt, and crown rot can also affect asparagus plants. Inspect your plants regularly and take prompt action to address any issues that arise.
Pruning is another important aspect of asparagus care. In the first year after planting, allow the asparagus spears to grow into tall, fern-like foliage without harvesting any spears. This allows the plant to focus on developing a strong root system and ensures a more bountiful harvest in the future.
In subsequent years, prune back the dead foliage in late winter or early spring before new growth emerges. This helps to keep the plants healthy and encourages new, vigorous growth.
Harvest Time: Picking Your Asparagus
Knowing when to harvest your asparagus is crucial for enjoying tender, delicious spears and maintaining the health of your plants.
In general, it’s best to wait until the second or third year after planting before you begin harvesting asparagus. This allows the plants to become well-established and ensures a more abundant harvest in the long run.
When your asparagus plants are ready for harvesting, look for spears that are about 6-8 inches tall and have tightly closed tips. These are the ideal size for picking, as they’re still tender and full of flavor.
To harvest, simply grasp the spear near its base and snap or cut it off just above soil level. Be careful not to damage any emerging spears or the crown of the plant during the process.
During the harvest season, which typically lasts for about 6-8 weeks, you can expect to pick asparagus every few days as new spears continue to emerge. It’s important to harvest regularly, as unharvested spears will quickly grow into tall, fern-like foliage, making them tough and inedible.
Savoring Your Homegrown Asparagus
After all your hard work and patience, it’s finally time to enjoy the fruits (or spears) of your labor! Homegrown asparagus is a true delight, with a fresh, vibrant flavor that’s unmatched by store-bought varieties. To preserve the quality of your harvest, it’s best to eat or process your asparagus within a day or two of picking.
For short-term storage, you can keep your asparagus in the refrigerator by standing the spears upright in a jar with an inch or two of water, similar to how you rooted the scraps initially. Cover the spears loosely with a plastic bag and change the water as needed to keep it fresh.
If you’d like to preserve your asparagus for longer periods, you can blanch and freeze the spears or pickle them according to your favorite recipe. This allows you to enjoy the delicious taste of homegrown asparagus all year long.
With your asparagus harvest in hand, it’s time to get creative in the kitchen! Asparagus is a versatile vegetable that can be enjoyed in a variety of dishes, from simple roasted or grilled spears to more elaborate preparations like creamy asparagus soup, asparagus risotto, or even asparagus quiche.
The possibilities are endless, so don’t be afraid to experiment and discover new ways to savor your homegrown asparagus.
Lessons Learned from Growing Asparagus from Scraps
Embarking on this journey of growing asparagus from scraps has been an incredibly rewarding and enlightening experience.
Through trial and error, research, and hands-on practice, I’ve gained invaluable insights into the world of sustainable gardening and the amazing potential of regrowing vegetables from kitchen waste.
One of the key lessons I’ve learned is the importance of patience and persistence. Growing asparagus from scraps isn’t an overnight process, but the wait is well worth it when you finally get to enjoy the fruits of your labor.
Along the way, I’ve also developed a deeper appreciation for the natural processes that govern plant growth and the delicate balance between providing care and allowing nature to take its course.
Furthermore, this experience has reinforced the value of sustainable gardening practices, not only for the health of our environment but also for our own well-being.
By repurposing kitchen scraps and nurturing them into thriving plants, we can reduce waste, save money, and enjoy the satisfaction of growing our own food.
Conclusion
As my asparagus adventure comes to a close, I hope that sharing my experiences and discoveries will inspire others to try their hand at growing asparagus from scraps.
Whether you’re a seasoned gardener or an aspiring green thumb, this project offers a unique opportunity to learn, grow, and contribute to a more sustainable future.
If you’re considering embarking on your own asparagus journey, remember to be patient, attentive, and open to learning from your experiences.
With time, dedication, and a little bit of luck, you too can enjoy the satisfaction of harvesting your own homegrown asparagus and savoring the delicious rewards of your efforts.
In the end, growing asparagus from scraps is more than just a gardening project – it’s a testament to the incredible power of nature and our ability to harness it in creative, sustainable ways.
So why not give it a try? You might just discover a new passion and a deeper appreciation for the wonders of the natural world.